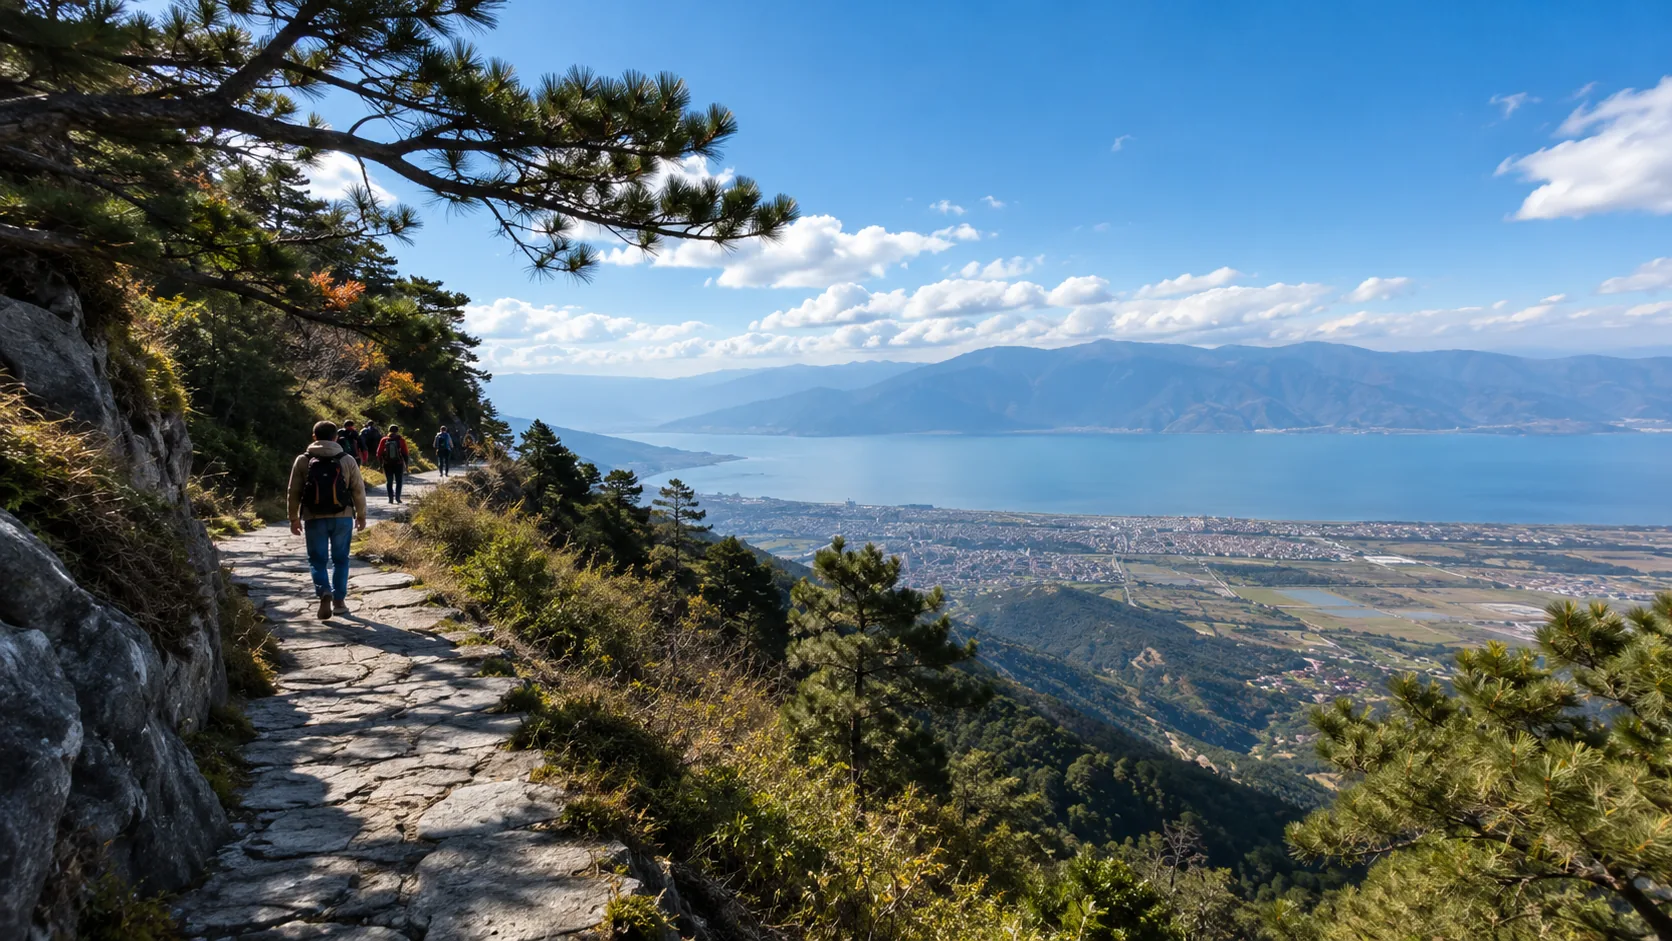



Day 1: Enter via Baiyun Mountain South Gate, Meihua Valley to Moxing Ridge, Exit via West Gate
Placing Baiyun Mountain on Day 1 is very appropriate. Its advantage is not that it is “easy,” but that it is controllable. For a 4-day continuous trek, the first day fears two things: first, the route being too fragmented, causing you to lose your rhythm; second, hitting dirt paths, wild trails, or long climbs right away before your legs are warmed up, causing your pace to drop. Baiyun Mountain won’t do that. Its road network is mature, entry and exit points are clear, the main lines have high recognizability, and the supply points, rest areas, and restrooms along the way are much more complete than typical suburban mountain routes. Putting it on the first day is more like recalibrating the feeling of your feet, knees, breathing, and backpack weight before entering the more continuous undulating routes of the next two days.
I usually arrive at the South Gate around 08:00 and don’t delay too late. Once Guangzhou mountain routes hit noon, the physical sensation becomes noticeably muggy, especially in areas with many steps. The heat isn’t the hardest part; the hardest part is the humidity. You are constantly sweating, your clothes won’t fully dry, and the shoulder straps and back area will gradually develop a stifling pressure. Therefore, starting early on the first day and taking the first half more leisurely will actually save more energy later on.
- 08:00 Arrive at Baiyun Mountain South Gate
- 08:20 Enter the mountain
- 09:00 Pass through the Meihua Valley area
- 10:30 Reach the middle climbing section
- 11:30 Rest near Moxing Ridge
- 12:00—13:00 Lunch and hydration
- 13:00 Walk along the main trail towards the West Gate
- 15:00 Begin descent
- 16:00 Exit from the West Gate
- 16:30 Return to accommodation
The benefit of this approach is that there are clear goals for the first half of the day without being too rushed. After entering from the South Gate, the first thing the body feels is not the gradient, but the frequency of the steps. The truly grueling part of Baiyun Mountain isn’t a specific steep section, but rather the “one step after another” continuity that never quite breaks. When you start with high spirits, your pace naturally quickens, but if you push your cadence too high in the first hour, by the time you approach the Moxing Ridge section, your quads will tighten, making the descent later much more prone to soreness.
In my own approach to this day, I generally treat the first 90 minutes as an adjustment phase. It’s not a sluggish stroll, but a steady walk where your breathing and steps align. Around nine o’clock, you pass the Meihua Valley area; at this point, you should still feel “whole” and the route is smooth, which is the perfect time for your first water refill. Don’t wait until you’re thirsty to drink; in Guangzhou’s weather, by the time you truly feel dehydrated, your condition has already dropped a notch.
| Time Slot | Route Location | Physical Sensation | My Approach |
|---|---|---|---|
| 08:00—08:20 | Outside South Gate to Entry | Just arrived, state is fresh | Drink a few sips of water before going up, readjust pack straps |
| 08:20—09:00 | South Gate to Meihua Valley | Smooth road feel, easy to speed up | Deliberately suppress speed, don’t rush the early stage |
| 09:00—10:30 | Meihua Valley to mid-climb | Steps become continuous, sweat is obvious | Small sips of water at intervals, don’t stop for too long |
| 10:30—11:30 | Middle section to Moxing Ridge | Breathing pressure rises, legs start feeling it | Shorten stride, don’t skip steps |
| 12:00—13:00 | Rest on mountain | Body heat is high, appetite might not be large | Eat until 70% full, don’t chug water all at once |
| 13:00—15:00 | Main trail towards West Gate | Psychologically feels easy, but feet are tired | Restrain yourself on the descent, don’t let go just because it’s ending |
| 15:00—16:00 | West Gate descent | Knee and sole feedback is more obvious | Use short steps to descend, protect toes and knees |
On this day at Baiyun Mountain, the route itself isn’t complex, but what truly separates the experience is time management. For example, during the noon period, many people delay lunch until after one o’clock. On the surface, it’s just a late meal, but the actual impact is significant: the sun is already up, body temperature is high, clothes are damp, and the legs have just finished a climb. Replenishing at this point is not as comfortable for the body to absorb. I prefer to find a place to sit for a while as noon approaches, finish lunch and hydration, and make the afternoon descent a bit more relaxed.
The most common mistake I make at Baiyun Mountain is not taking the wrong path, but going too smoothly early on and misjudging my stamina, thinking “today is only the first day, I feel great.” But by the afternoon descent towards the West Gate, your knees and soles will tell you the truth. The descent at Baiyun Mountain looks friendly, but the pressure on the quads is actually quite high, especially when carrying water and supplies; your center of gravity is constantly forward, and if your stride is too large, your toes will start hitting the front of your shoes. If you hold back a bit here on the first day, Huolushan on the second day will be much easier.
From a transportation perspective, the South Gate is a very suitable starting point. Since many people are starting from a hotel or station on Day 1, there is a higher demand for “fewer transfers and less pathfinding” in the morning. The South Gate area is highly developed, making it easy to buy water or bread before entering. Exiting from the West Gate is also logical; taking a taxi back to your accommodation after descending is generally more worry-free than backtracking. The most important thing for Day 1 is not how full the itinerary is, but whether you can smoothly return to shower, eat, and rest after finishing. In continuous trekking, how smoothly you wrap up determines your state when you wake up the next day.
I generally place the accommodation for the first night in areas within a 15 to 25 minute drive from the South or West Gates. The reasons are very practical. First, after finishing Baiyun Mountain, clothes are basically soaked in sweat, so the faster you get back to your stay, the better. Second, you still need a proper dinner at night; if the location is too remote, finding food will consume more energy. Third, you need to transfer towards Tianhe on Day 2; living too far will eat up your rest time during the morning commute. In continuous hiking, saving half an hour of hassle at night makes a significant difference to body recovery, especially for calves and soles.
- Prioritize the convenience of the return trip for the 1st night’s stay, don’t just look at the price
- Being close to the exit makes showering and changing clothes faster
- Easy access to hot meals is more important than “trendy shops”
- Staying in a middle position is more energy-efficient for transferring to Huolushan the next day
In terms of costs, the day at Baiyun Mountain isn’t high, but it’s not enough to just count the entrance ticket. The real expenses usually lie in transportation and supplies. One trip to the South Gate in the morning, one trip back from the West Gate in the afternoon, plus daytime drinking water, lunch, and a formal dinner at night—calculating a steady budget based on a normal trekking day is more realistic.
| Item | Approximate Cost Range | Description |
|---|---|---|
| Round-trip Transport | 30—80 Yuan | Depends on starting point and hotel distance |
| Mountain Supplies | 10—30 Yuan | Mainly water and simple snacks |
| Lunch | 20—40 Yuan | Avoid food that is too oily or heavy |
| Dinner | 30—80 Yuan | Focus on physical recovery |
| Accommodation | 200—500 Yuan | Varies by area and date |
Regarding food, I don’t arrange anything fancy on Day 1. Lunch is on the simple side, with the priority of not burdening the stomach. Things like rice balls, bread, sandwiches, or ripe bananas have a low impact on the afternoon descent. Once back near the accommodation in the evening, eating warm staples and protein-rich food will speed up recovery. Continuous trekking is different from ordinary tourism; it’s not about going wherever is popular, but whether you can keep walking the next day after eating.
Another practical advantage of Baiyun Mountain is its “human touch.” It’s not the pure silence of a wild mountain, but a mountain frequently used within the city. You will encounter people exercising, jogging, or taking children out, as well as real hikers with backpacks. There is a benefit to walking this kind of mountain on the first day: you don’t have to throw yourself into an environment that is too remote or empty immediately. It makes it easier to enter a trekking state psychologically. Especially when just switching from stations, airports, or hotels, a route with a sense of urban connection like Baiyun Mountain allows the body and mind to slowly transition into “walking mode.”
When approaching Moxing Ridge around noon, don’t treat it as the most important “check-in point” of the day; it’s more of a rhythmic node. Reaching here means you’ve handled the climbing for the first half of the day; the real caution is needed for the afternoon descent. Many people stay here too long, taking photos, sitting, chatting, and eating too much, only to find that when they stand up after one o’clock, their legs are heavy and the first ten minutes are particularly difficult. My own practice is to set a clear time to get up and not let the noon rest become disorganized. The most valuable thing on Day 1 isn’t a specific photo, but that the body remains steady after the whole day.
Baiyun Mountain is great for judging your true state. Feeling easy in the morning doesn’t mean all 4 days will be easy; feeling heavy legs at noon doesn’t mean you won’t be able to move later. It’s like a trial run route that exposes issues like cadence, hydration, pack weight, footwear, and lunch volume in advance. If you get these parts right on the first day, you’ll have a better foundation for Huolushan on Day 2.
When beginning the descent around three in the afternoon, I specifically remind myself not to rush. This time point easily creates an illusion: feeling that today is almost over, wanting to go down quickly, shower quickly, and eat quickly. But what truly makes the second day miserable is often not the morning climb, but this “extra burst of speed” during the afternoon. When the descent is continuous, the knees endure repeated braking, and the soles endure prolonged pressure. Even if you shorten your stride just a little more than usual, waking up the next day will be much easier.
The value of placing Baiyun Mountain on Day 1 lies here. It’s not the wildest, hardest, or most varied of these 4 days, but it is the most suitable for setting the right rhythm for the whole trip. Entering from the South Gate, passing through Meihua Valley, connecting to Moxing Ridge, and exiting from the West Gate—arranged this way, the route is complete, the entry and exit are natural, and the daytime hours can be fully utilized without rushing. for those who want to walk the remaining three days steadily, this day shouldn’t be skipped or haphazardly changed.
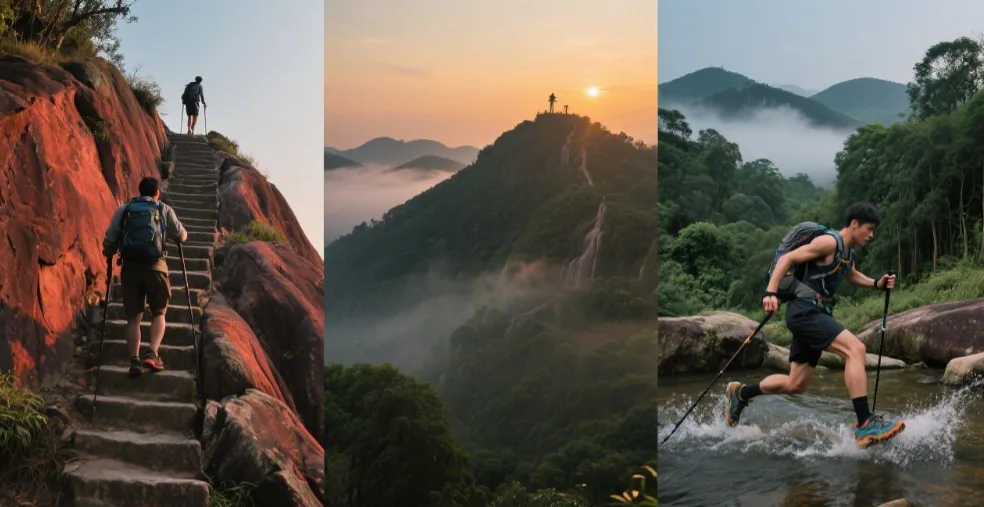
Day 2: Enter via Huolushan South Gate, Trekking the Zhuzishan and Fenghuangshan Line
On Day 2, I will significantly step up the route. Day 1 at Baiyun Mountain was more about getting the body into a state; the line from Huolushan to Zhuzishan and Fenghuangshan is where the feeling of truly continuous trekking begins. The most obvious change isn’t the elevation numbers, but the feel of the path underfoot. Baiyun Mountain consists mostly of organized park trails with regular steps, junctions, and rest areas; Huolushan is different—dirt paths, crushed stone, short slopes, and small undulations are more frequent, and the walking isn’t as “neat,” making energy consumption more dispersed. You won’t just get tired on one long slope; you’ll gradually lose your legs through repeated ups and downs.
When planning Day 2, I don’t set the goal as “completing the entire line at all costs,” but rather keep the main line with the strongest trekking feel while accounting for current condition, weather, and afternoon energy. This is because the true difficulty of this line isn’t at the start, but from the midpoint onwards. Many people walk the first half smoothly and assume today won’t be a problem, but once they hit the Zhuzishan section and head towards Fenghuangshan, the undulations along the ridge start connecting, and stamina finally reveals its limits. If Day 2 is handled steadily, Day 3 on Niutoushan will be much more comfortable; if you rush the front end on Day 2, you’ll have to pay it back over the next two days.
- 08:00 Arrive at Huolushan Forest Park South Gate
- 08:20 Start the ascent
- 09:20 Enter continuous uphill sections
- 10:20 Reach the vicinity of Zhuzishan
- 11:20 Advance towards Fenghuangshan
- 12:00—13:00 Lunch and rest
- 13:00 Continue along ridge and undulating sections
- 14:30 Reach an area with open views
- 15:30 Begin descent
- 16:30 Exit the mountain
- 17:00 Return to accommodation
Starting from the South Gate on this day, I usually enter a “rhythm control” state earlier than on Day 1. This is because Huolushan isn’t the kind of line where you can just walk and find your feeling casually. When starting into the mountain, people often naturally shorten their steps because the ground isn’t as even, but they easily overlook one thing: although the steps aren’t large, the legs are constantly making fine movements. Especially when the soles first hit dirt and stone paths, the ankles constantly make micro-adjustments, and the body enters a consumption state earlier than you think.
After entering from the South Gate, the first part is relatively easy to walk. The true sense of continuity usually begins about an hour later, when the undulations become frequent; the climb doesn’t hit you all at once, but comes section by section without stopping. This kind of route is very easy to misjudge. Because you’ll feel “each section isn’t that long,” but when they are connected, the consumption is more suffocating than the regular steps of Baiyun Mountain. The exhaustion of Baiyun Mountain is straightforward; the exhaustion of Huolushan creeps up on you.
| Time Slot | Route | Body Sensation | My Walking Strategy |
|---|---|---|---|
| 08:20—09:20 | Huolushan South Gate to early gentle climb | Breathing pressure is low, ankles start adapting to terrain | Don’t speed up, find stable footing first |
| 09:20—10:20 | Continuous uphill to near Zhuzishan | Calves and quads start sustained effort | Use short steps, avoid overstriding |
| 10:20—11:20 | Zhuzishan towards Fenghuangshan | More undulations, stamina is gradually eaten away | Don’t rush slopes, don’t sprint on flats |
| 12:00—13:00 | Lunch and organization | Body heat is obvious, sitting too long leads to stiffness | Control rest length, don’t let the rhythm fall apart |
| 13:00—14:30 | Ridge and undulating sections | Doesn’t look steep, but is actually the most grueling | Small sips of water, keep stride short |
| 15:30—16:30 | Descent and exit | Feedback from soles and knees kicks in | Don’t rush the descent, don’t lean too far forward |
The area around Zhuzishan is where I think Day 2 is most likely to be “underrated.” On a map, it’s not a long slope that immediately makes you flinch; in practice, the trouble lies in the fine and dense undulations. You just come out of one climb and think your feet can relax, only to hit another short slope immediately—your legs never get a true break. This is especially noticeable if you just finished Baiyun Mountain on Day 1 and already have baseline fatigue. You’ll feel that it’s not that you can’t get up, but that the output isn’t smooth, as if there’s never a real gap for the legs to relax.
One thing I frequently do on this day is actively suppress the “rush mentality.” Huolushan easily triggers this thought for a simple reason: you’ll see people ahead of you, and you’ll feel the current slope isn’t long, so you naturally want to catch up, push, or speed up. But this route isn’t meant for that. Chasing for ten extra minutes early on might cost you half an hour later to find your state again. Especially after heading towards Fenghuangshan, the path starts looking more like a standard mountain trail and no longer just a park walkway; attention must remain on the ground, making both body and mind more tired.
When I walk this line, the most obvious feeling is “don’t be fooled by the section in front of you.” Just because it doesn’t look high, far, or steep doesn’t mean the consumption is low. The difficulty of Huolushan isn’t a single point, but the fact that you are almost always exerting effort. Especially after entering Zhuzishan, the slopes are short but continuous, recovery is slower than at Baiyun Mountain, and if you try to speed up in the afternoon, your legs will quickly turn heavy.
I handle the lunch period very cautiously. Day 2 is not a day for long rests. On the Baiyun Mountain day, sitting a bit longer didn’t have a huge impact; on Huolushan, it does. Because you’ve been on dirt paths for a long time, the leg muscles are in constant micro-tension and you’ve been sweating more densely; if you sit too long and wait for the body to cool down before getting up, the first 10 minutes will feel significantly “wooden.” My habit is to find a place to sit, replenish water, electrolytes, staples, and some salty food, eat until about 70% full, tidy up my sweat-soaked clothes, and keep the rest to around 45 minutes before continuing.
- Don’t eat too oily at noon, as the ridge section in the afternoon will feel uncomfortable
- Don’t chug a lot of water at once; drinking in several intervals is steadier
- If your socks already feel damp, it’s best to deal with them during the noon break
- A long rest makes the legs tighten up, making it harder to start the second half
After advancing towards Fenghuangshan, the trekking feel of the route becomes more complete. This “completeness” isn’t about more attractions, but about truly entering a state of alternating between ridges and undulations. The views will be more open, and the road more varied, but energy consumption is even harder to control. Because it’s easy to relax on the ridge, feeling that you finally don’t have to keep lifting your legs to climb, resulting in naturally speeding up on the flat ground—which makes the next short slope even more miserable. The most likely problems on the afternoon of Day 2 occur not at the steepest parts, but when you feel “I’m doing okay now”—the mind relaxes, and the feet speed up.
I treat the period after one o’clock as the part of the day that truly requires careful calculation. The first half of the day is mainly for getting into the state and building baseline consumption; the second half determines whether you can finish the day beautifully. Especially after two o’clock, sun, humidity, and fatigue all stack together. The most avoided thing at this time is not being slow, but being disorganized. Some people start rushing the descent time, some start accelerating continuously when they see open ground, and others feel “I’ve made it this far today, eating a bit more won’t hurt.” All these approaches will make the final descent much harder to walk.
For accommodation, I usually place the 2nd night in Tianhe North or an area close to the starting direction of Day 3. This isn’t to be in a lively area, but to minimize the next morning’s transfer. In continuous trekking, the 20 minutes saved in the morning isn’t just about time—the physical burden really is lighter. After showering and eating the night before, being able to lie down earlier allows the soles and calves to recover more fully. After finishing Huolushan on Day 2, one becomes very sensitive to “how far back to the hotel,” so whether the stay is convenient is much more important than how good the room looks in photos.
| Item | Approximate Cost Range | My Personal View |
|---|---|---|
| Transport to Huolushan | 20—60 Yuan | Depends on starting point; starting early is more efficient |
| Hydration and snacks | 15—35 Yuan | Water consumption is faster on Day 2 than Day 1 |
| Lunch | 20—40 Yuan | Simple, durable, and not filling the stomach is more important |
| Dinner | 30—80 Yuan | Focus on replenishing staples and protein |
| Accommodation | 220—500 Yuan | Look more at location than just price |
Regarding food, I don’t arrange anything too complex for the noon of Day 2. The most suitable items are easy to eat, not heavy on the stomach, and allow you to continue immediately after eating. Things like rice balls, sandwiches, bread, bananas, and a few nuts are all steadier than hot soup or noodles. The reason is simple: the undulations in the middle and latter parts of Huolushan aren’t cleanly broken; if you eat too much, the body has to climb while digesting, making the afternoon more stifling. Dinner can be more substantial to replenish staples and protein, ensuring the legs don’t feel “empty” when waking up on Day 3.
From a route judgment perspective, I mark several places as “active slow-down” spots. Not because they are particularly dangerous, but because they easily drop you into rhythm problems. What you truly need to be careful of on Day 2 are the sections where you think “it should be fine.”
- The small undulations before and after Zhuzishan look short but accumulate quickly
- If it rained the day before, the ridge mud will be sticky, making footing unstable
- In the open-view positions in the afternoon, it’s very easy to speed up due to a relaxed mood
- The first half of the descent often makes you want to finish quickly—stay steady instead
The walking style I least recommend for Day 2 is resting too long at noon and trying to catch up in the afternoon. This combination is damaging. After sitting a long time, the legs will be heavy, and when getting up, you’ll likely want to use a faster speed to regain your state—resulting in placing heavy pressure on the soles and knees in the first 10 minutes. On a road like Huolushan, once the first section of the afternoon is handled poorly, it’s hard to get back on track.
When the route is long, companions are also easily separated. Huolushan is different from Baiyun Mountain; many places in Baiyun Mountain have clear park road networks, so even if the distance between people opens up, the psychological pressure is low. The line from Huolushan connecting to Zhuzishan and Fenghuangshan requires constant attention to footing and direction; once the distance increases, the team rhythm breaks easily. My experience is that the most comfortable formation for Day 2 is not everyone perfectly side-by-side, but always being able to see each other. Faster people shouldn’t wait too long at the front, and slower people shouldn’t force themselves to keep up. As long as everyone walks at their own steady pace, the whole group actually saves energy.
Placing Huolushan on Day 2 has a clear meaning: this day isn’t just “harder than yesterday,” but marks the start of truly entering the track of continuous trekking. The road feel is wilder, the rhythm more refined, the undulations more fragmented, and the body feedback more honest. Entering from the South Gate, connecting to Zhuzishan, and advancing towards Fenghuangshan—this line is perfect for depicting the transition from urban walkways to real mountain paths in Guangzhou’s mountain lines. After finishing this day and looking back at Baiyun Mountain, you’ll realize that was only the beginning.
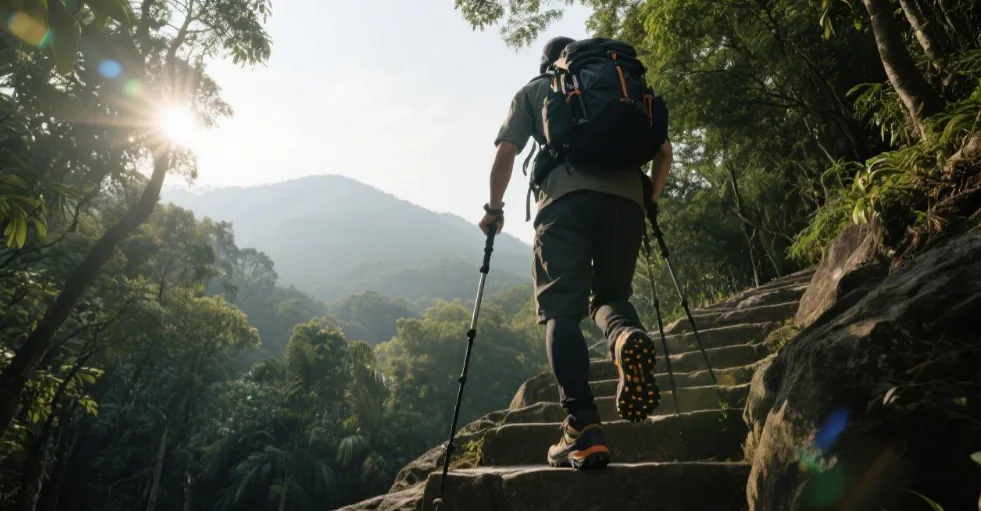
Day 3: Niutoushan Main Line Trekking, following the Ascent—Ridge—Descent sequence
Placing Niutoushan on Day 3 is, in my opinion, the most suitable arrangement for this 4-day trip. It’s not necessarily because it is “more famous” than the first two days, but because it relies more on body control after continuous trekking. On the Baiyun Mountain day, you could still rely on a sense of novelty; on the Huolushan day, you could still rely on route variety to keep your attention up; by Day 3, the body is no longer in a “just started” state. Backpack pressure on the shoulders, heat in the soles, tightness in the calves, and slight feedback in the knees when going down steps—all these will appear together. Niutoushan is best walked at this time because it fully amplifies your trekking habits from the previous two days. If your rhythm was steady the first two days, you’ll feel the lines are very smooth on Day 3; if you were always rushing, Day 3 will expose it as soon as you start up the mountain.
I usually treat Day 3 as the day requiring the most careful energy distribution in the entire 4-day line. It’s not that every section is particularly hard, but that it doesn’t allow for sloppy handling. The truly grueling part of a main line trek like Niutoushan is that you are no longer entering in a full state. You look like you can walk at the start, and your body can keep up, but from the midpoint onwards, any small mistake will be amplified. For example, if you ate too little breakfast, you’ll feel empty around 11 o’clock; if you went too fast in the first half of the ascent, the descent after noon will press hard on your toes; if you eat too much for lunch, the ridge section in the afternoon will feel heavy in your stomach. On Day 3, many problems don’t appear suddenly; they accumulate from earlier.
- 07:30 Depart for the Niutoushan starting point
- 08:30 Arrive at the trailhead
- 08:50 Start the ascent
- 10:00 Finish the first climbing section
- 11:00 Enter the ridge section
- 12:00—13:00 Lunch and hydration
- 13:00 Continue forward
- 14:30 Reach the main open viewpoint
- 15:00 Start the descent
- 16:30 Return to the mountain foot
- 17:00 End of the day’s itinerary
On this day, I will wake up a bit earlier than the previous two days because Niutoushan is not suitable for entering the mountain slowly after the sun is fully up. On Day 3, the body is already carrying the accumulated fatigue from before; the later you start, the more muggy heat and psychological drain stack up, making the whole line a drag. Departing around seven-thirty allows you to handle breakfast and hydration on the way, giving you a bit of a buffer at the trailhead so you’re not immediately shouldering your pack and heading uphill. In continuous trekking, this pre-departure buffer is very important. It’s not flashy, but it makes the first 40 minutes much more stable.
The interval from the trailhead to the end of the first climb is, I believe, the easiest place to ruin the rhythm for the entire day. A common issue on the morning of Day 3 is that people mistakenly think they have “already adapted,” so they naturally walk faster at the start than on Day 1. But the body isn’t actually adapted; it’s just a bit more blunt. Feeling like you can accelerate doesn’t mean your legs actually have a surplus. Especially after two consecutive days of climbing, the calves and quads haven’t fully recovered; if you start with big strides right away, your breathing and legs will both be pushed too high and will be hard to bring back down later.
My own approach is to treat the first hour or so as “preserving state” rather than “gaining progress.” During the early climb, I deliberately shorten my stride; I’d rather take more steps than take big ones. The benefit of this is clear: breathing won’t get disorganized, calves are less likely to harden prematurely, and the backpack’s center of gravity remains more stable. Especially on Day 3, when the soles of your feet are already feeling something, stepping uphill with large strides makes the front of the foot more tired, leading to persistent discomfort later.
| Route Section | Main Sensation | My Personal Approach | Problems if handled poorly |
|---|---|---|---|
| Early Ascent | Breathing starts to rise, legs not fully warmed up | Short steps, suppress speed, don’t rush early stage | Legs feel heavy around ten o’clock, can’t lift pace later |
| After First Climb | Body enters stable output | Find a steady breath, don’t rush to speed up | Accelerating too early causes a drop in state before noon |
| Ridge Section | Views open up, mind easily relaxes | Eyes on the road, steady progress | Distraction, too much photography, energy gets fragmented |
| Afternoon Section | Fatigue starts accumulating | Small sips of water, shorter intervals | Easy for lethargy and “empty legs” to appear |
| Descent Section | Pressure on knees, toes, and soles simultaneously | Short steps for descent, don’t sprint slopes | Waking up the next day will be noticeably tiring |
When the first climb ends around ten o’clock, this isn’t a “relaxation point” for me, but a “check point.” I look at two things at this time: first, is my breathing steady today; second, are the soles of my feet heating up prematurely. If the early part was walked correctly, there should only be normal sweating without strong fatigue; if it was walked too fast, you’ll start feeling “empty legs” or premature soreness in the quads at this time. The scariest thing on Day 3 isn’t a poor state, but starting to drop speed and refusing to admit it by pushing through. Niutoushan isn’t meant for that kind of walking because the subsequent ridge and descent will amplify the issue.
After entering the ridge section, many people focus on the scenery and the sense of openness. This is normal because compared to the earlier climb, the mind feels lighter on the ridge and eyes can finally leave the ground to look into the distance. However, I actually become more serious here. The ridge on Day 3 isn’t a rest period; it’s just a shift from “pushing upward” to “sustained output.” You feel like you aren’t lifting your legs constantly anymore, so you naturally pick up a little speed—but this is precisely when stamina is most easily fragmented. Especially since the ridge involves walking a bit followed by small undulations, combined with stopping for photos, views, and pack adjustments, the segment doesn’t seem intense but the actual consumption is very scattered.
The most easily misjudged part of Niutoushan isn’t the climb, but the ridge. Because it feels more comfortable than uphill, strides naturally get larger and people are more willing to stop multiple times. But on Day 3, your body is carrying the foundation of the previous two days; every extra step and every extra minute standing will be accounted for during the descent later. The ridge section needs flow, not speed.
During the noon period, I place more importance on salt intake and sock management than the previous two days. Drinking only plain water on Day 3 is often not enough. It’s not that an immediate problem will occur, but between one and two-thirty in the afternoon, one becomes lethargic—the legs don’t necessarily hurt, but you don’t want to lift them. This feeling is distinct, like a battery slowly draining. My method is simple: I replenish with some salty food during lunch or drink beverages containing electrolytes. Another thing is changing socks. On Day 3, the soles of your feet start to truly have a “presence”; if your socks are already damp, even just changing to dry ones during the break will make the next hour or two much more comfortable.
- Breakfast shouldn’t be handled with an empty stomach; ideally have some staples
- Lunch shouldn’t be oily or too filling; around 70% is most appropriate
- Replenishing some salt at noon will make the afternoon state much steadier
- If socks are damp, it’s worth changing them during the noon break
- Don’t drink too much water at once; drinking in intervals is more effective
I usually keep my noon rest within one hour and don’t let it drag. Like Day 2, sitting too long on Day 3 is not a good thing, and it’s even more noticeable on Day 3. Because the body has walked for two and a half days straight, once you sit until the sweat recedes, legs cool down, and muscles loosen, getting back up will be difficult. The most common sensation is that the first few minutes after standing feel like you can’t step firmly—soles are wooden and knees aren’t as agile. Therefore, I keep my noon break concise: eat, drink, change socks, tidy sweat-soaked clothes, and then get up on time without lingering.
Continuing forward after one o’clock in the afternoon, this segment feels more like a rhythm settlement for the day than just walking. Because by this point, how you walked, drank, and ate earlier will be collectively reflected. For those who walked correctly, the afternoon is just a bit slower but overall smooth; for those who were disorganized earlier, they will start stopping frequently or wanting to find places to sit. On Day 3 at Niutoushan, what truly separates people isn’t the steepest point, but this kind of moment where it looks like you can keep going but fatigue is actually piling up.
When reaching the main open viewpoint around two-thirty in the afternoon, many people’s moods improve because the view is vast and they naturally get a bit excited. But I actually restrain myself more here. The reason is simple: when the end is not far off, people are most prone to two mistakes—one is speeding up, and the other is relaxing their footing. Especially on Day 3, legs are not in a full state; this bit of excitement before the descent easily makes strides larger, and when the real descent begins, the knees and toes will bring the bill back.
| Time Slot | Focus | What I Pay Attention To |
|---|---|---|
| 07:30—08:30 | To the start | Move early to leave a buffer for the body |
| 08:50—10:00 | Early Ascent | Don’t rush speed, stabilize breathing |
| 10:00—11:00 | Transition after climb | Check soles and legs for feedback, adjust timely |
| 11:00—12:00 | Ridge progress | Eyes on the path, don’t spend too long taking photos while walking |
| 12:00—13:00 | Noon break | Control food volume, replenish salt, change socks |
| 13:00—15:00 | Afternoon main line | Small sips of water, don’t increase stride |
| 15:00—16:30 | Descent | Hold back, especially don’t sprint downhill |
The descent section is, I have always felt, the part of Niutoushan that requires the most sense of experience. Many people feel that the hardest part is over and all that’s left is returning to the mountain foot. In reality, the descent on Day 3 tests your movements more than the ascent. Because by this point, your quads have been working for two and a half days straight, and their “braking” ability will have decreased, while the soles of your feet are no longer fresh. As long as you take large steps, your toes will constantly hit the front of your shoes and your knees will endure more forward impact. This issue doesn’t appear after just a few steps; it becomes increasingly obvious after half an hour of continuous descent.
My principle is simple: keep steps short on the downhill, don’t press the center of gravity too far forward, and don’t let go and sprint even if the road looks smooth. This is especially true for places with loose gravel, dirt, or roots; as you reach the afternoon of Day 3, you cannot be careless. Once the body is tired, many small movements slow down, and points you could easily step on firmly might wobble a bit more now. For continuous trekking, whether you descend steadily on the last day is more important than how fast you climbed today.
Many people assume the hardest part of Niutoushan is the upward climb. After actually walking it, I feel that the descent is where your skill really shows. Because during the ascent, people still remind themselves to be serious; during the descent, it’s easiest to think “it’s almost over.” But Day 3 is the least suitable time for that thought. If you can hold back during the descent, you’ll save a lot for the whole day, and once you get back to shower, eat, and sleep, the body’s reaction will be completely different.
Regarding transportation and accommodation, I won’t do anything too exhausting after finishing Day 3. After walking Niutoushan all day, the body has a very clear sense of “it’s time to stop,” and it’s not suitable to mess with long-distance commutes or moving to a remote accommodation. I generally choose a place that is on the way back, has convenient dining, and allows for a quick shower. The room size and decor are not the focus; the focus is being able to sit down as soon as possible after descending, replenishing water, eating a hot meal, and airing out your feet. If this bit of recovery on the night of Day 3 is done well, Day 4 will feel much lighter even if it’s just a recovery line.
| Item | Approximate Cost Range | My Personal View |
|---|---|---|
| Transport to the start | 30—80 Yuan | I recommend starting early and minimizing transfers on Day 3 |
| Supplies on the road | 15—40 Yuan | Salt and water are more important than in the first two days |
| Lunch | 20—40 Yuan | Simple, moderately salted, don’t get too full |
| Dinner | 35—90 Yuan | Replenish staples and protein |
| Accommodation | 220—500 Yuan | Being on the way back with nearby food is more important |
Regarding food, I’ll take breakfast on Day 3 more seriously than on Day 2, rather than just making do with some snacks. It’s best to have stable staples like porridge, noodles, or rice balls, plus a bit of protein; even if the amount isn’t large, it’s much better than entering the mountain on an empty stomach. Lunch is the opposite: keep it simple and avoid heavy oil. This is because the worst thing on Niutoushan is having your stomach feel constantly full. In the evening, eat something warm near your accommodation to make up for the consumption of the first 3 days—this is the way to eat on Day 3.
Placing Niutoushan on Day 3 is a great way to illustrate that “continuous trekking isn’t about one burst, but about the whole day.” The ascent must be steady, the ridge shouldn’t be sloppy, and the descent needs even more restraint. You can’t use too much force in the first half, you can’t let the rhythm break during lunch, you can’t speed up just because the view is open in the afternoon, and you especially can’t take shortcuts during the final descent. After actually walking it, you’ll realize Day 3 isn’t won by sprinting, but by not making major mistakes throughout the route.
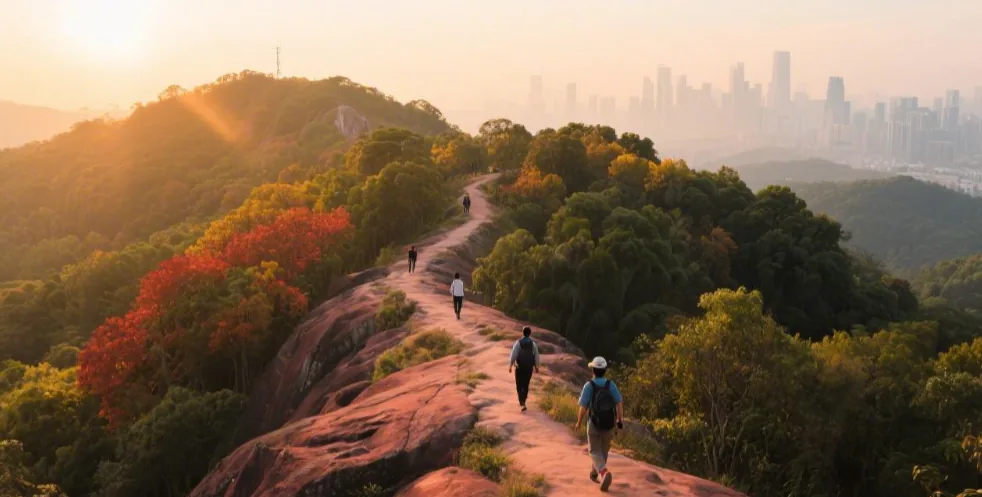
Day 4: Wrap up lightly, follow a recovery line
On Day 4, I will no longer arrange heavy routes or pursue climbing and distance. By the time you reach Day 4, the body has remembered the contents of the previous 3 days: the continuous steps of Baiyun Mountain, the fragmented undulations of Huolushan, and the ascent, ridge, and descent of Niutoushan—these won’t completely vanish after a night’s sleep. If you still force a long climb on Day 4, the physical sensation of the entire 4-day trek can easily sour in the last half-day. The truly comfortable way to conclude is not to “add another big one,” but to give the body a line it can walk and stay active on without adding further pressure.
On the morning of Day 4, I usually experience 3 distinct sensations. The first is tightness in the calves, especially noticeable during the first few steps after getting out of bed; the second is a feeling of heat in the soles—not necessarily pain, but you know as soon as your shoe touches the ground that you’ve been walking for days; the third is that your quads will remind you while going downstairs that they’ve worked for 3 days straight. At this time, route planning shouldn’t be about “how much more can I walk today,” but “how can I walk most smoothly today.” A well-planned Day 4 makes the whole trip feel cohesive; a rushed Day 4 will wash away the comfort accumulated over the previous 3 days in the last few hours.
- 08:30 Departure
- 09:30 Arrive at the day’s trekking start point
- 09:40 Start walking the gentle route
- 11:30 End the morning trek
- 12:00 Lunch
- 13:30 Continue on a short route
- 15:00 Conclusion of the 4-day itinerary
I deliberately push the departure time for Day 4 back a bit, no longer heading into the mountain early like on Day 2 and Day 3. The reason is simple: this day doesn’t require trading intensity for the early morning hours, nor does it require finishing a big climb before high temperatures set in. Giving the body more time to organize in the morning is actually more valuable. For example, slowly move your ankles and calves after waking up, eat a normal breakfast, and regain the composure that was compressed by the rushed departures of the previous 3 days. The best state for Day 4 isn’t excitement, but being relaxed and smooth.
From a transportation perspective, I usually don’t arrange a starting point that is too far away on Day 4. Either choose a trail near your accommodation or a route that is simple to reach without repeated transfers. This is because the focus of Day 4 isn’t “is it worth the special trip,” but “is it necessary to spend another 40 minutes of hassle for this line.” The truly mountain-heavy parts have been walked in the first 3 days; as long as Day 4 can keep the body moving and the legs active, the whole itinerary is complete.
What is suitable for Day 4 is not a mountain line with constant elevation and leg pressure, but a trail with gentle slopes, plenty of shade, smooth road feel, and convenient entry and exit. Ideally, it should have several characteristics: first, the ups and downs shouldn’t be too dense; second, the road surface shouldn’t be too fragmented; third, you should be able to stop at any time; fourth, it should be convenient to reach lunch and the return trip after finishing. For me, the recovery line on Day 4 isn’t just “walking around casually,” but a light line with a clear purpose. The purpose is straightforward: to transition the body smoothly out of continuous load rather than stopping abruptly.
| Time Slot | Arrangement | My Personal Sensation | How to walk this more comfortably |
|---|---|---|---|
| 08:30—09:30 | Depart to starting point | Just fully awake, body is slowly loosening up | Don’t rush, ensure a steady breakfast |
| 09:40—11:30 | Morning gentle route | Legs slowly warm up without being pushed too hard | Keep pace level, don’t chase step counts |
| 12:00—13:00 | Lunch | Body starts to relax, appetite better than previous days | Eat something warm, avoid heavy oil |
| 13:30—15:00 | Afternoon short wrap-up | Soles will remind you it’s Day 4 | Maintain activity level, don’t add intensity |
The reason intensity needs to drop on Day 4 is that after 3 continuous days of walking, fatigue has changed from “exercise-induced tiredness” to “baseline physical fatigue.” The fatigue of Day 1 is mostly within that day; the fatigue of Day 2 carries into the night; the fatigue of Day 3 usually carries into the morning of Day 4. Especially the kind of pressure caused by descending won’t completely pass just by sleeping. Quads, glutes, calves, and soles will all retain a certain tension. If you arrange another long descent or long step route at this time, the first things to feel uncomfortable aren’t your breathing, but your knees and toes. many people mistakenly think that as long as they can still walk on Day 4, it means they can keep adding content. In reality, being able to walk doesn’t mean it’s suitable to keep adding volume.
On Day 4, what I care about most is “whether my physical reactions have become blunt.” For example, when starting on flat ground, are my feet a bit slower than on Day 1; when turning down a small slope, are my legs naturally more conservative; when the pack goes on my shoulders, does the neck and shoulder area feel heavier than in the previous days. These details indicate that Day 4 should be treated as recovery management rather than a trekking challenge. People who have truly walked multi-day lines usually understand one principle: when the last day is planned steadily, the entire journey looks like a complete line rather than being full at the front and suddenly falling apart at the end.
The most obvious change on Day 4 isn’t a sharp pain anywhere, but that the body’s reactions become a bit slower. You can still go uphill, and the downhill isn’t unbearable, but every movement isn’t as agile as the first two days. If you still plan according to a heavy-line mindset, the itinerary looks fine on the surface, but the soles, knees, and back will settle the bill after you return. Being a bit lighter isn’t because you can’t walk, but because wrapping up this way is smoother.
I generally keep the gentle morning route to about two hours. It’s long enough to re-warm the body but not long enough for the soles to continue swelling. The pace on Day 4 is different from previous days; I no longer pursue continuous advancement but focus on whether movements are smooth. For example, is there dragging when landing the foot, are the ankles still flexible, and is the shoulder strap rubbing against spots that were sweaty before. These seem small, but they are the parts that truly affect physical comfort. The value of a recovery line isn’t how long it is on the map, but whether your body slowly loosens up during the walk.
- Don’t start Day 4 too fast; use the first 20 minutes just to find your feeling
- If your soles feel hot as soon as you start, it means the fatigue from the first 3 days is still there—hold back even more today
- The water volume in your pack can be less than the previous two days, but you must carry some
- Around noon, try to find a place where you can eat as soon as you sit down, rather than making a special detour
- In the afternoon, I’d rather have the short line be a bit less than adding heavy slopes just to fill half a day
On Day 4, I actually eat more completely at lunch than on the previous days. In the first 3 days, lunch was kept very restrained to avoid affecting the walk; on Day 4, because the morning only involved a gentle route, the body hasn’t been pushed too high and the appetite is more stable. This is a good time for a proper hot meal to replenish the recovery that has been suppressed for several days. My habit is to sit down and eat this meal seriously, not solving it while walking or delaying it too late. Because even though the afternoon of Day 4 is just a short line, if you eat too oily or too much, you’ll still feel a drag while walking.
Regarding food, the most suitable for Day 4 is warm staples plus some protein, and the volume can be slightly more than the lunch on Day 2 and Day 3, but still don’t overdo it. By the last day of continuous trekking, the body needs stable recovery, not binge eating. Especially if you have a return trip in the afternoon, eating too heavily won’t make the ride comfortable either.
| Item | Approximate Cost Range | How to spend reasonably on Day 4 |
|---|---|---|
| Transport to the start | 15—50 Yuan | Try to choose something close with fewer transfers |
| Morning hydration | 5—15 Yuan | Carrying basic drinking water is enough |
| Lunch | 25—50 Yuan | Suitable for eating a serious hot meal |
| Afternoon snacks | 5—20 Yuan | Decide whether to add based on return trip time |
| End-of-day transport | 20—60 Yuan | Focus on convenience for the station or returning to stay |
Continuing the short line after one-thirty in the afternoon, I no longer pursue a “complete route feel” but treat it as a closing movement. The walking style is more like an extended activity rather than starting a new trek. For example, choose a gentle path with more shade and walk while slowly bringing the body from “using force for several days” back to a daily state. This time is most suitable not for hitting long uphills, but for letting the calves, ankles, and shoulders continue to move for a while under a light load. Many people overlook this, thinking that the morning is the end. But in my actual experience, this short line in the afternoon of Day 4 is very useful; it allows the tension built up over the previous days to slowly dissipate, rather than dropping abruptly from a high load to a complete stop.
My standards for the type of walkway suitable for wrapping up have always been very practical. The first type is tree-lined paths on the edge of the city—wide, gentle undulations, steady walking, no need to constantly watch your feet. The second type is walkways on the periphery of scenic areas—even if there’s a slight slope, it shouldn’t be continuous for too long. The third type is continuous walkways along the foot of a mountain or a lake, which allow for constant walking without forcing exertion. The two types least suitable for Day 4 are long stairs and crushed stone with long descents. The former continues to grind the quads, and the latter presses the soles and knees again.
When I plan the Day 4 route, the first standard isn’t whether it looks good, but whether the body feels lighter after walking. A truly suitable recovery line shouldn’t make you keep thinking “how much longer” while walking, nor should it make you want to find a place to sit and not move immediately after finishing. It should bring down the fatigue of the first 3 days rather than stacking more on top.
The accommodation and return arrangements for Day 4 also need to be different from the thinking for the first 3 days. Where you stayed before was mostly for the convenience of departing the next day; Day 4 is more about how smooth the wrap-up and departure are. If I am returning on that day, I prioritize placing lunch and the short line in areas not far from the station, subway, or stay. This way, after finishing the morning walk, eating at noon, and doing a bit more activity in the afternoon, the entire wrap-up is natural. The most avoided thing on Day 4 isn’t having too little content, but having arrangements that are too fragmented. A recovery line is meant to slowly stabilize the body and rhythm; too many transfers, backtracking, or temporary additions will break that comfort.
If the first 3 days were quite full, there’s another common reaction on the morning of Day 4: the area where your toes hit the front of the shoe will feel a bit swollen, especially noticeable while going downstairs. At this time, I adjust the shoelaces to be looser to give the forefoot some space, which makes walking the gentle route much more comfortable. I no longer pack the bag as full as the previous two days—water just needs to be enough, and if lunch can be eaten sitting down, I no longer carry too much food. Reducing pack weight on Day 4 helps with shoulder/back comfort and descent movements.
- Don’t tighten the front of the shoelaces too much; leave space for the toes
- Pack water volume according to half a day, no need to prepare for a heavy full-day line
- If the soles feel swollen after the morning walk, shorten the afternoon line further
- Don’t temporarily add major slopes on Day 4 just for the sake of “I’m already here”
From an experience standpoint, the most comfortable state on Day 4 isn’t “I can actually still walk this much,” but “I feel quite relaxed after finishing.” In a 4-day continuous trek, a truly experienced arrangement isn’t about filling every day to the brim, but knowing when to let go and when to restrain. Being a bit lighter on Day 4 might seem like a step back, but it actually holds the first 3 days together. Finishing the gentle morning line, eating a hot meal, and slowly adding a short line in the afternoon to end the 4-day itinerary around three o’clock makes the entire Guangzhou trekking trip feel very complete.
Related Reading
- Guangzhou 5-Day Citywalk | Tianhe South Road No.1 + Tiyu Xilu Heng Street + Liede Village, Hidden Alley Treasures Behind the Prosperous CBD
- 4-Day Family Trip to Guangzhou | Chimelong Safari Park + Birds Park + Guangdong Science Center, Stress-Free Guide for Parents
- Guangzhou 5-Day Lakeside Cycling Tour | Bio Island Greenway + Haizhu Lake + Baiyun Lake Park, The Most Beautiful Two-Wheel Route Through Urban Water Systems
- Guangzhou 4-Day Music & Theater Tour | Xinghai Concert Hall + Guangzhou Opera House + Friendship Theatre, A Visual & Auditory Journey of Elegant Art and Supreme Acoustics
- Guangzhou 5-Day Temple Zen Journey | Night View of Dafo Temple + Haizhuang Temple + Nengren Temple, A Tranquil Blessing Trip in a Bustling Metropolis